Defect Life Cycle
Software testing is not only about identifying defects but also about managing them effectively until they are resolved. Once a defect is discovered, it must be tracked through a structured process to ensure that it is properly investigated, fixed, and verified. This structured workflow is known as the Defect Life Cycle, also commonly called the Bug Life Cycle. Understanding the defect life cycle is essential for manual testers, developers, and project managers because it ensures that defects are handled in a controlled and transparent manner.
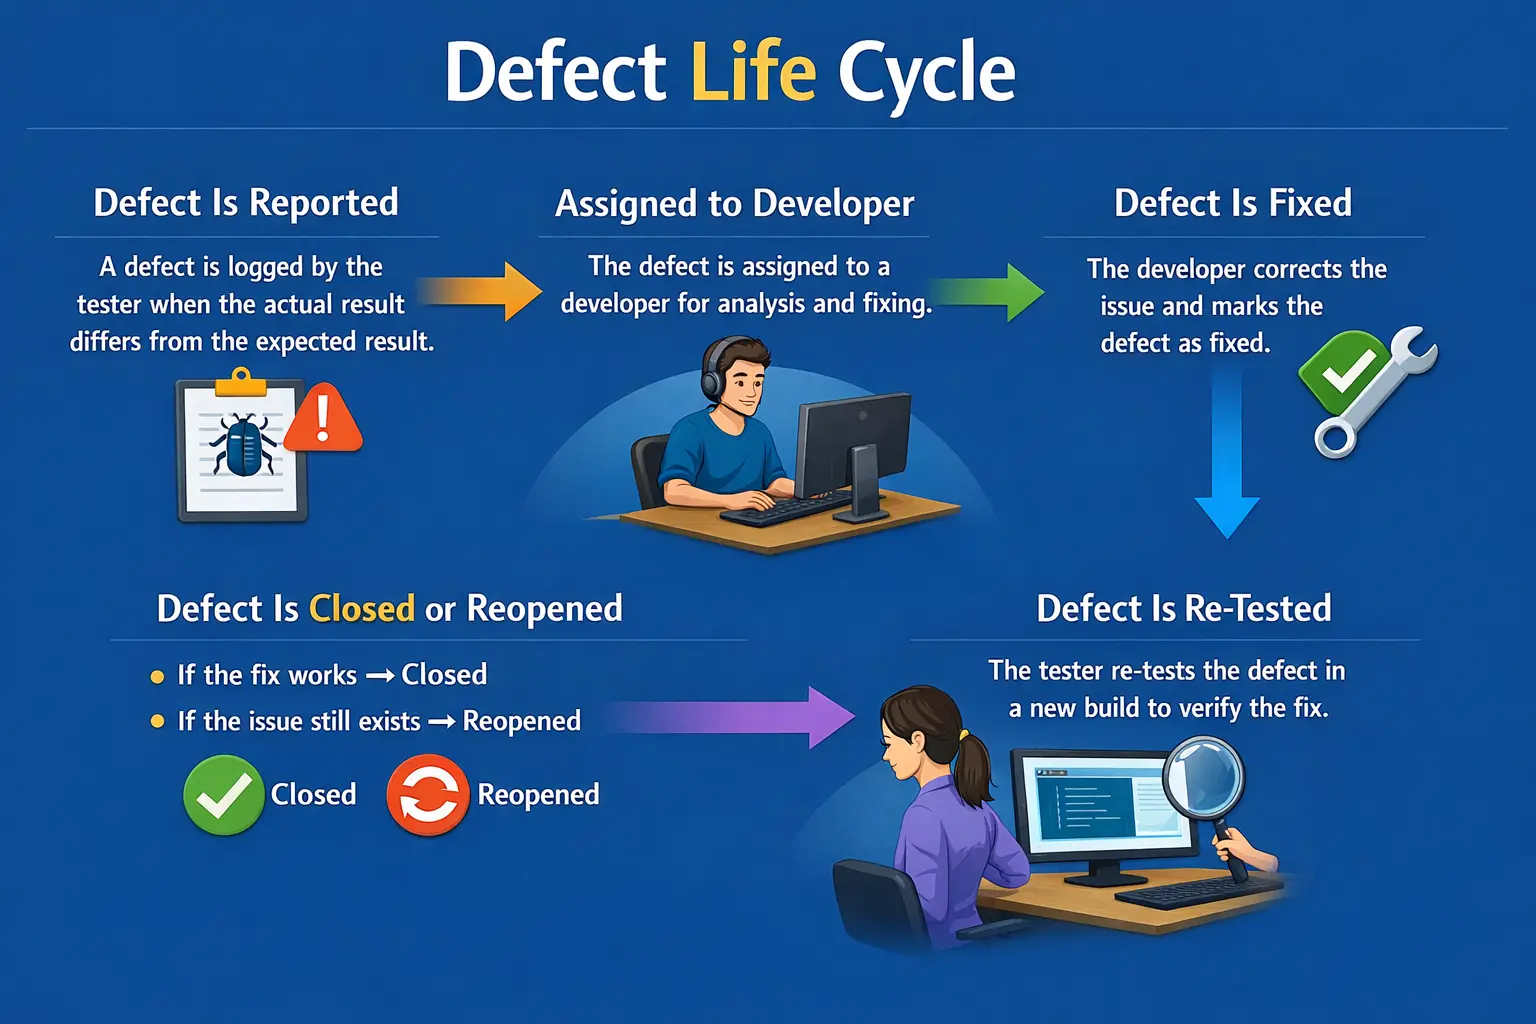
The Defect Life Cycle describes the sequence of states that a defect passes through from the moment it is identified until it is finally closed. It defines how defects are tracked, assigned, resolved, and verified throughout the testing process. In simple terms, the defect life cycle answers the question: “What happens to a defect after it is reported?”
A properly defined defect life cycle ensures that defects are not lost, ignored, or incorrectly resolved. It provides visibility into defect status and helps teams maintain accountability and quality standards.
Understanding the Defect Life Cycle
When a tester discovers a problem during testing, the issue is documented and entered into a defect tracking system. From that point forward, the defect moves through several stages until it is resolved. Each stage represents a specific activity performed by testers, developers, or project managers.
The defect life cycle provides a structured approach for managing defects. Without a defined process, defects might be overlooked or improperly handled, leading to unresolved issues in production.
Defect tracking tools such as Jira, Azure DevOps, and Bugzilla implement defect life cycle workflows. These tools allow teams to track defect status, assign responsibilities, and monitor progress.
The defect life cycle also improves communication between testers and developers. Each status update clearly indicates the current state of a defect and the next required action.
In real projects, a defect is rarely fixed by one person silently from beginning to end. A tester discovers the issue, a lead may review it, a developer investigates it, another developer may review the fix, a build team deploys the change, and the tester verifies the result. The defect life cycle coordinates all these actions by making the current status visible to everyone.
The life cycle also prevents confusion about ownership. If a defect is New, it needs review. If it is Assigned, a developer or team owns it. If it is Fixed, it needs verification. If it is Reopened, the previous fix did not fully resolve the issue. These states help the team understand what should happen next without depending only on verbal communication.
A good defect life cycle is not just a workflow inside a tool. It is a discipline. The team must update statuses honestly, add useful comments, attach evidence, and avoid moving defects to the next state before the required work is done. A workflow is useful only when people follow it consistently.
Purpose of the Defect Life Cycle
The primary purpose of the defect life cycle is to provide a systematic method for defect management. Software projects often involve hundreds or thousands of defects, and managing them without a structured approach would be extremely difficult.
A defined life cycle ensures that every defect is tracked from discovery to resolution. It provides clear visibility into defect status so that stakeholders understand the current quality of the application.
The defect life cycle also establishes accountability. Each defect is assigned to a responsible person, ensuring that it receives proper attention.
Transparency is another important benefit. Project managers and stakeholders can monitor defect trends and evaluate product quality based on defect statistics.
Most importantly, the defect life cycle prevents defects from being forgotten. Every reported issue remains visible until it is resolved or formally closed.
Another important purpose is release control. Before a release, stakeholders need to know how many defects are open, how many are fixed but not retested, how many are reopened, and how many are deferred. The defect life cycle provides this information through status tracking. Without it, release decisions become guesswork.
The life cycle also supports defect aging analysis. If a high-priority defect remains open for several days, the team can identify delay and take action. If many defects remain in Re-Test status, testers may need more time or a stable build. If many defects are Reopened, the team may need better root cause analysis. Status data helps identify bottlenecks.
The defect life cycle also creates an audit trail. Each transition tells a story: who reported the defect, who accepted it, who fixed it, when it was retested, and why it was closed, rejected, duplicated, or deferred. This history is useful for reviews, compliance, lessons learned, and future maintenance.
Standard Defect Life Cycle States
Although the exact workflow may vary between organizations, most projects follow a similar set of standard defect states. These states represent the typical progression of a defect from discovery to closure.
New
The life cycle begins when a tester identifies a defect and logs it into the defect tracking system. At this stage, the defect is marked as New.
The New status indicates that the defect has been reported but has not yet been reviewed. The tester provides essential information such as steps to reproduce, expected results, actual results, environment details, and severity.
This stage is important because it formally records the issue and ensures that it becomes part of the project’s defect tracking system.
Once logged, the defect is usually reviewed by a test lead or project manager before being assigned to a developer.
The quality of the New state depends heavily on the quality of the defect report. A defect logged as New should contain a clear title, affected module, environment, build version, test data, steps to reproduce, expected result, actual result, severity, and supporting evidence. If this information is missing, the defect may be delayed before it even reaches development.
Testers should avoid logging a defect as New without basic confirmation. They should verify that the issue is not caused by wrong test data, incorrect environment, misunderstood requirements, or use of an outdated build. This does not mean testers must solve the defect, but the initial report should be reliable enough for review.
Assigned
After review, the defect is assigned to a developer or development team. At this stage, the defect status changes to Assigned.
The Assigned state indicates that responsibility for fixing the defect has been allocated. The developer is expected to analyze the problem and determine the appropriate solution.
Assignment ensures accountability because it clearly identifies who is responsible for resolving the defect.
The Assigned state typically lasts until the developer begins work on the issue.
Assignment may happen to an individual developer, a module owner, or a development team depending on project structure. In large applications, the test lead or triage team may need to identify the correct owner based on module, service, database area, or integration point. Incorrect assignment can delay resolution.
During this state, the defect is visible but not necessarily being actively fixed. The assigned owner is responsible for reviewing the issue and deciding the next action. If the defect belongs to another team, it may be reassigned with comments explaining the reason.
Open
When the developer accepts the defect and begins investigating it, the defect status changes to Open.
The Open state indicates that the defect is valid and that fixing activity has started. The developer analyzes the root cause of the issue and prepares code changes to resolve it.
During this stage, developers may communicate with testers if additional information is required. Testers may be asked to clarify reproduction steps or provide additional evidence.
The Open state represents active work on the defect.
In the Open state, developers may reproduce the defect, inspect logs, debug code, review recent changes, compare environments, and analyze related requirements. If the defect is not clear, they may ask the tester for more information. Good collaboration during this state reduces back-and-forth delay.
Sometimes a developer may determine that the issue is not a code defect but a requirement clarification, configuration issue, test data issue, or duplicate of another defect. In that case, the defect may move to a different state such as Rejected, Duplicate, or Need More Information. The transition should include a clear explanation.
Fixed
Once the developer resolves the issue, the defect status changes to Fixed.
The Fixed state indicates that code changes have been completed and the issue is believed to be resolved. The developer commits the changes and provides a new build for testing.
At this stage, the defect is not yet considered resolved. It must be verified by testers to ensure that the fix works correctly.
The Fixed state marks the transition from development activity to testing activity.
A defect marked Fixed should ideally include comments from the developer explaining what was changed, which build contains the fix, and whether any related areas may be affected. This helps testers plan retesting and regression. A status change without build information can create confusion because testers may not know where to verify the fix.
Fixed does not mean Closed. This is one of the most important points for beginners. A developer may believe the issue is resolved, but QA must verify it in the correct build. Until retesting confirms the expected behavior, the defect remains open from a quality perspective.
Re-Test
After receiving the new build, testers verify whether the defect has been fixed. During this phase, the defect status is often set to Re-Test or Ready for Testing.
The tester executes the same steps that originally produced the defect. The goal is to confirm that the issue no longer exists.
Re-testing is an essential part of defect management because developer fixes may sometimes introduce new issues or fail to resolve the original problem completely.
The Re-Test state ensures that fixes are validated before closure.
During retesting, the tester should follow the original reproduction steps and use the same relevant data or conditions. If the original defect occurred only for a specific role, browser, date, account type, or workflow path, the retest should include that condition. Otherwise, the tester may falsely assume the defect is fixed.
Retesting should also include a quick check of nearby behavior when appropriate. If a fix was made to password validation, the tester may check registration, reset password, and change password flows. This does not replace full regression testing, but it helps catch obvious side effects.
Closed
If the tester confirms that the defect has been resolved successfully, the defect status changes to Closed.
The Closed state indicates that the issue has been fixed and verified. No further action is required.
Closing a defect represents the final stage of the defect life cycle. The defect remains in the tracking system as part of project history and documentation.
Closed defects provide valuable information for future projects and quality improvement efforts.
Closing a defect should be done only after successful verification. The closure comments may mention the build tested, retest result, and any related regression performed. This creates useful history for future reference. If the same issue appears again later, the team can review the original defect and understand how it was fixed previously.
Closed defects should not disappear from project learning. They can be analyzed later to identify defect-prone modules, common root causes, repeated requirement gaps, or areas needing stronger automation. Closure ends the individual defect workflow, but the information remains valuable.
Reopened
Sometimes a defect may persist even after a developer reports it as fixed. In such cases, the tester changes the defect status to Reopened.
The Reopened state indicates that the defect still exists and requires further investigation.
Reopened defects are returned to the developer for additional fixing.
This state helps ensure that defects are not incorrectly marked as resolved.
Reopening a defect should be supported by clear evidence. The tester should mention the new build, retest steps, observed result, and proof that the issue still exists. A vague comment such as "still not working" is not enough. Developers need to understand whether the original problem remains exactly the same or whether a related issue has appeared.
A high number of reopened defects may indicate process problems. Developers may be fixing symptoms instead of root causes, testers may be reporting unclear steps, or requirements may be misunderstood. Tracking reopened defects helps teams improve both development and testing discipline.
Additional Defect States in Real Projects
Real-world projects often include additional defect states beyond the standard workflow. These states handle special situations that may occur during defect management.
A defect may be marked as Rejected if it is determined not to be a valid defect. This may happen when the reported behavior matches the requirements.
A defect may be marked as Duplicate if the same issue has already been reported. Duplicate defects are usually linked to the original defect.
Some defects may be marked as Deferred if the decision is made to postpone the fix to a future release. Deferred defects are usually low priority issues.
A defect may be marked as Not Reproducible if developers or testers cannot reproduce the reported problem.
Some defects may be marked as Won’t Fix if the cost of fixing the issue outweighs the benefit. This decision is typically made by product management.
These additional states allow teams to manage defects more realistically and efficiently.
Rejected does not always mean the tester made a mistake. Sometimes the reported behavior is later clarified as expected behavior, out of scope, or a change request rather than a defect. However, rejection should always include a clear reason. If the reason is not documented, the same issue may be reported again by another tester.
Duplicate defects should be linked to the original defect whenever possible. This preserves evidence from multiple reporters while keeping the main discussion in one place. Duplicate reports may still be useful if they show the issue occurs in another browser, role, data condition, or environment.
Deferred defects should be visible in release discussions. A deferred defect is not fixed; it is a known issue accepted for a later time. The decision to defer should usually involve business stakeholders, especially if the issue affects users. Deferred defects should not become forgotten defects.
Not Reproducible defects require careful handling. If a developer cannot reproduce an issue, the tester may need to provide logs, video, exact data, browser details, or timing information. Intermittent defects should not be dismissed too quickly, especially if the impact is serious.
Defect Triage and Life Cycle Decisions
Defect triage is closely connected to the defect life cycle. During triage, the team reviews newly reported and open defects to decide validity, severity, priority, ownership, and next action. Triage helps defects move through the life cycle in a controlled way.
In a triage meeting, a New defect may be assigned, rejected, marked duplicate, or sent back for more information. An Open defect may be escalated if it blocks release. A Fixed defect may be prioritized for retesting. A Deferred defect may be reviewed again before a future release.
Triage decisions should be documented in the defect record. If a defect is deferred, the reason should be clear. If priority changes, the reason should be recorded. If the defect is rejected, the requirement or business rule supporting that decision should be mentioned. This keeps the life cycle transparent.
Conceptual Defect Life Cycle Flow
The defect life cycle typically follows a structured flow from reporting to closure.
The process begins when a defect is logged as New. After review, it moves to Assigned, where responsibility is allocated. The defect then becomes Open when development work begins.
Once the fix is implemented, the defect moves to Fixed. Testers then verify the fix during Re-Test. If the issue is resolved, the defect is Closed.
If the problem persists, the defect is Reopened and returned to the developer.
This structured flow ensures that every defect is tracked and resolved systematically.
The flow may vary depending on project needs. Some teams move directly from New to Open, while others use Assigned as a separate state. Some teams use Ready for Retest instead of Fixed. Some teams require QA Verified before Closed. The names may differ, but the purpose remains the same: each defect should move through review, ownership, fixing, verification, and closure.
A healthy workflow avoids unnecessary complexity. Too few states may hide important information, while too many states may slow the team down. The best workflow is one that reflects real team responsibilities and gives stakeholders useful visibility without creating administrative burden.
The life cycle should also define who is allowed to move defects between states. For example, developers may move defects to Fixed, testers may move them to Closed or Reopened after retesting, and leads may move them to Deferred or Rejected after triage. Clear permissions prevent accidental or inappropriate status changes.
Manual Tester’s Responsibilities
Manual testers play a critical role in the defect life cycle. Their responsibilities begin with identifying defects during test execution.
Testers must confirm that an issue is a genuine defect before reporting it. Misreported defects waste development time and reduce efficiency.
When logging defects, testers must provide accurate and complete information. Clear reproduction steps and expected results are essential for developers.
Testers must assign appropriate severity levels based on defect impact. Incorrect severity assignments may delay critical fixes.
After developers fix defects, testers perform re-testing to verify the fixes. If the issue is resolved, testers close the defect. If not, the defect is reopened.
Testers must also communicate defect status clearly during meetings and reports.
Effective tester involvement ensures smooth defect management.
Testers should keep defect records updated with useful comments. If a developer asks for clarification, the answer should be added to the defect record, not only discussed verbally. If the issue is reproduced in another environment, that evidence should be attached. If retesting fails, the new result should be documented before reopening.
Testers also help identify whether a fixed defect requires regression testing. Some fixes are isolated, while others affect shared components, validations, workflows, or integrations. A tester with strong product understanding can suggest related areas that should be checked before closure.
During status meetings, testers should communicate defect status accurately. It is not enough to say "many defects are fixed." Stakeholders need to know how many are fixed but pending retest, how many are reopened, how many are blocked, and how many are still open. This distinction matters for release readiness.
Defect Life Cycle vs Test Case Life Cycle
The defect life cycle and test case life cycle serve different purposes in software testing.
The defect life cycle focuses on resolving issues found during testing. It tracks defects from discovery to closure.
The test case life cycle focuses on validating application functionality. It tracks test cases from creation through execution to pass or fail status.
The defect life cycle ends with defect closure, while the test case life cycle ends with test execution results.
Both life cycles are essential for effective testing.
A test case may fail because of a defect. When this happens, the test case status may become Failed, and a defect is logged. The defect then begins its own life cycle. After the defect is fixed and retested, the related test case may be executed again and marked Passed. This shows how the two life cycles connect.
The test case life cycle is about validation progress. The defect life cycle is about issue resolution. Confusing the two can create reporting problems. A defect may be Fixed but the related test case is not Passed until QA retests successfully. Similarly, a test case may be blocked even before any defect is logged if the environment or data is unavailable.
Defect Life Cycle in Agile Projects
In Agile projects, the defect life cycle is often faster but still necessary. Bugs found during a sprint may be discussed quickly with developers, but important defects should still be tracked so the team understands story readiness and release risk.
Some Agile teams fix small bugs immediately without a formal long workflow when the story is still under development. This can work for minor issues, but defects that affect acceptance criteria, regression, release scope, or production quality should be logged and tracked.
Agile boards often show defects along with stories and tasks. A story should not be considered Done if critical defects linked to it remain open. The defect life cycle helps the team maintain a realistic view of sprint completion.
Real-Time Example
Consider a login feature that fails when users enter valid credentials.
During testing, the tester discovers that valid credentials do not allow login. The tester logs the issue as a New defect.
The defect is reviewed and Assigned to a developer. The developer investigates and marks the defect as Open.
After implementing a fix, the developer marks the defect as Fixed and provides a new build.
The tester performs Re-Test and confirms that login works correctly.
The defect is then Closed.
This example demonstrates the typical progression of a defect through its life cycle.
Consider another example in an e-commerce checkout flow. A tester finds that applying a valid coupon does not reduce the order total. The defect is logged as New with steps, coupon code, expected discount, actual amount, browser, and build version. During triage, it is marked high priority because a campaign is active.
The defect is Assigned to the checkout developer and then moved to Open. The developer discovers that the coupon service response is not being applied in the final price calculation. After fixing the logic, the developer marks the defect as Fixed and mentions the build number containing the fix.
The tester performs Re-Test using the same coupon and verifies that the final price is now correct. The tester also checks that invalid coupons and expired coupons still behave correctly. After successful verification, the defect is Closed. This example shows how the life cycle supports both fixing and confidence.
Defect Life Cycle Metrics
Defect life cycle data can produce useful metrics. Common metrics include number of open defects, fixed defects pending retest, closed defects, reopened defects, rejected defects, deferred defects, average resolution time, average retest time, and defect aging.
Defect aging shows how long defects remain unresolved. A critical defect open for several days may need escalation. A large number of defects waiting in Re-Test may indicate that QA needs more capacity or a stable build. A high number of deferred defects may indicate release risk being postponed.
Reopen rate is another useful metric. If many defects are reopened, the team should investigate why fixes are failing. Possible causes include unclear defect reports, incomplete fixes, insufficient developer testing, unstable environments, or misunderstood requirements.
Common Mistakes in Defect Life Cycle Management
One common mistake is closing defects without proper re-testing. This can result in unresolved issues reaching production.
Another mistake is reopening defects without sufficient evidence. Reopened defects should include clear proof that the issue persists.
Valid defects are sometimes incorrectly rejected due to misunderstanding requirements.
Poor communication during status transitions can delay defect resolution.
Avoiding these mistakes improves defect management efficiency.
Another common mistake is moving defects to Fixed without mentioning the build or version where the fix is available. Testers then waste time checking the wrong build or asking for clarification. A fixed defect should include enough information for QA to verify it efficiently.
Some teams also leave defects in New or Assigned status for too long. This usually means triage or ownership is weak. Defects should be reviewed quickly so that valid issues move toward resolution and invalid or duplicate issues are handled properly.
Another mistake is using Deferred too casually. Deferred defects are still known issues. If too many defects are deferred without business understanding, release risk increases. Deferred defects should be reviewed, prioritized, and planned rather than ignored.
Teams may also confuse Fixed with Closed. Fixed means the developer has made a change. Closed means QA has verified that the defect no longer exists. Treating Fixed as the final state can allow unresolved defects to escape into production.
Best Practices for Managing the Defect Life Cycle
A good defect life cycle should be simple, clear, and consistently followed. Every team member should understand what each status means and who is responsible for the next action. Ambiguous status definitions create confusion and delay.
Defect reports should be complete before they enter the workflow. Clear steps, expected results, actual results, environment details, build version, severity, and evidence help defects move faster. Poor reports often remain stuck in clarification states.
Status changes should include useful comments. If a defect is rejected, the reason should be documented. If it is duplicated, the original defect should be linked. If it is deferred, the release or business reason should be mentioned. If it is fixed, the fixed build should be identified.
Defects should be reviewed regularly. Daily defect review or triage helps identify blockers, aging defects, high-priority issues, and defects waiting for retest. Regular review keeps the life cycle active and prevents issues from becoming stale.
Interview Perspective
The defect life cycle is a frequently asked topic in software testing interviews.
A short interview answer typically describes the defect life cycle as the stages a defect passes through from identification to closure.
A detailed answer explains each defect state and how defects are tracked and resolved systematically.
Interviewers may also ask about additional states such as Duplicate or Deferred.
Understanding the defect life cycle demonstrates practical testing knowledge.
In interviews, a strong answer should explain both the sequence and the responsibility. For example: "The defect life cycle is the flow a defect follows from New to Assigned or Open, then Fixed, Re-Test, Closed, or Reopened. Additional states such as Duplicate, Rejected, Deferred, and Not Reproducible may also be used depending on project workflow."
If asked about a tester's role, explain that testers identify defects, log them with complete details, assign severity, support clarification, retest fixes, close defects when resolved, and reopen them with evidence if the issue persists. This shows that you understand practical defect management.
If asked why the defect life cycle is important, explain that it ensures no defect is lost, every issue has ownership, fixes are verified before closure, and stakeholders can track product quality. This answer connects the lifecycle to real project value.
Defect Life Cycle and Release Readiness
Release readiness depends heavily on defect status. A product may not be ready if critical defects remain Open, if many defects are Fixed but not retested, or if important defects are Reopened. The defect life cycle gives stakeholders a clear view of these conditions.
Before release, teams usually review open defects, high-severity defects, deferred defects, and defects pending retest. If all critical defects are closed and remaining issues are accepted by business stakeholders, the release may proceed. If major defects remain unresolved, release may be delayed.
This is why status accuracy matters. If a defect is incorrectly marked Closed, stakeholders may believe the product is safer than it really is. If defects remain in outdated statuses, release reports become unreliable. Good lifecycle discipline supports better release decisions.
Key Takeaway
The Defect Life Cycle defines the structured workflow that defects follow from discovery to closure. It ensures that defects are tracked, assigned, fixed, and verified systematically.
A well-managed defect life cycle improves transparency, accountability, and product quality. It ensures that no defect is lost or incorrectly resolved.
Understanding the defect life cycle is essential for effective software testing and professional quality assurance practices.
A defect life cycle is useful only when the team respects the meaning of each state. New defects must be reviewed, assigned defects must have ownership, open defects must be investigated, fixed defects must be retested, reopened defects must include evidence, and closed defects must represent verified resolution.
For manual testers, understanding the defect life cycle is a core professional skill. It helps testers report issues responsibly, communicate status clearly, verify fixes properly, and contribute to release confidence. A well-managed defect life cycle turns defect handling from a chaotic activity into a controlled quality process.