Defect Metrics
Defect Metrics are quantitative measurements used to analyze defects, evaluate product quality, and assess the effectiveness of the software testing process. In professional software testing environments, defect metrics provide a data-driven view of software quality and project risk, allowing teams to make informed decisions based on measurable evidence rather than assumptions.
Defect metrics answer an important quality-related question: what do defect numbers tell us about product quality and project risk? A defect list by itself is only raw information. It tells the team that issues exist, but it does not automatically explain where the risk is, whether testing is effective, how quickly issues are being fixed, or whether the product is becoming stable enough for release.
Software testing generates large volumes of defect data during a project. Every logged defect may include severity, priority, module, environment, status, root cause, detected phase, fixed date, reopened count, and resolution type. Without proper analysis, these details remain scattered records in a defect tracking tool. Defect metrics convert that raw data into meaningful insights that help teams understand product stability, testing effectiveness, process health, and improvement opportunities.
Defect metrics are widely used in manual testing environments to monitor testing progress, evaluate release readiness, and improve future development processes. Test leads use them in status reports, project managers use them during release reviews, developers use them to identify weak modules, and business stakeholders use them to understand quality risk before approving a release.
The most important point is that defect metrics should support judgment, not replace it. Numbers can show patterns, but experienced testers and leads must interpret those patterns in context. A high defect count may indicate poor quality, but it may also indicate strong testing. A low defect count may indicate stability, but it may also indicate weak coverage. Good defect metrics combine data with professional analysis.
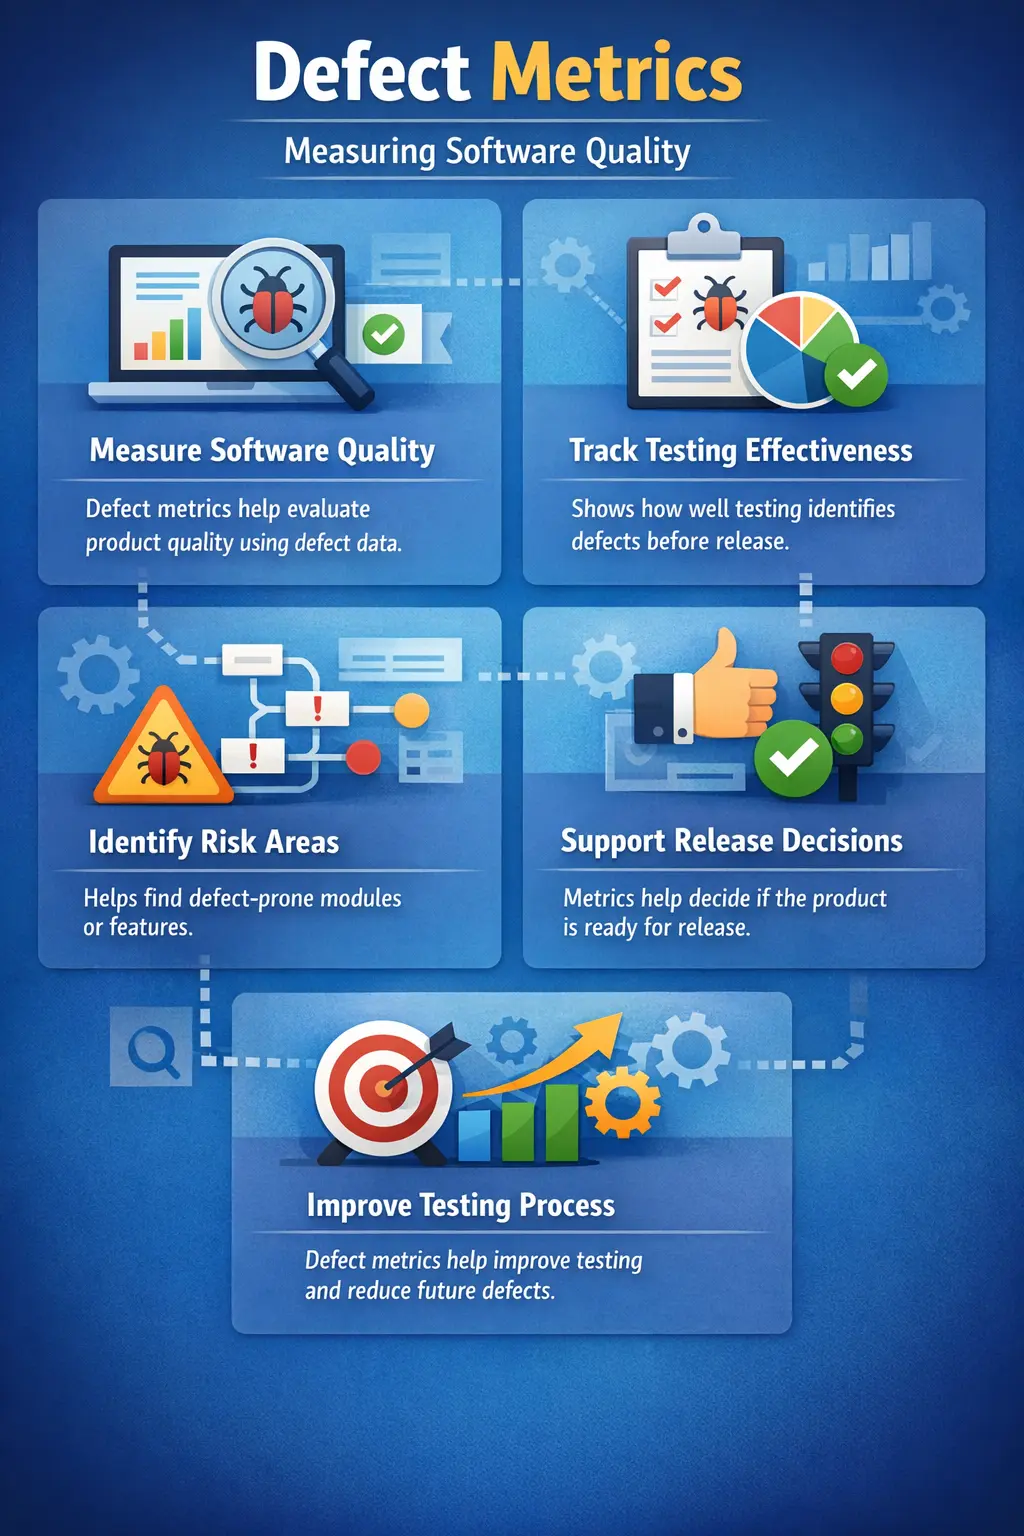
Understanding Defect Metrics
Defect metrics transform defect data into measurable indicators of quality. They help teams understand how defects are distributed across the system, how quickly they are fixed, how many remain open, which modules are unstable, and how effective testing activities are at detecting issues before release. They make quality discussions more concrete because the team can talk about trends and evidence instead of opinions alone.
During testing, defects are logged and tracked using defect management tools. Each defect contains information such as severity, priority, module, status, detected phase, assigned owner, resolution time, reopened status, and root cause. Defect metrics analyze this information to produce meaningful patterns.
Defect metrics are essential because software quality cannot be measured only by subjective feeling. A tester may feel that a build is unstable because many scenarios failed. A developer may feel that the product is improving because several defects were fixed. A manager may feel that release is close because the deadline is near. Metrics provide a more objective base for these discussions by showing open critical defects, defect aging, leakage risk, rejected defects, and defect trends.
Defect metrics are useful throughout the Software Testing Life Cycle. During early testing, metrics help identify unstable modules and areas that need more attention. During later testing, they help evaluate release readiness. After release, they help assess defect leakage and process effectiveness. Across multiple releases, historical metrics reveal whether quality is improving or declining.
Organizations that use defect metrics effectively can improve both product quality and testing efficiency. They can find where defects are concentrated, which types of defects recur, whether defect fixing is slow, whether test coverage is weak, and whether production issues are reducing over time. This makes defect metrics a practical tool for continuous improvement.
Purpose of Defect Metrics
The primary purpose of defect metrics is to measure product quality objectively. Instead of relying only on assumptions, teams can evaluate quality using measurable data. This is important because release decisions often involve risk. Stakeholders need to know not only whether testing was completed, but also what kind of defects were found and what risk remains.
Defect metrics help track testing effectiveness. By analyzing defect patterns, teams can determine whether testing activities are identifying defects early enough. If many defects are found late in the cycle or after release, it may indicate that test planning, test design, or regression coverage needs improvement.
Another important purpose of defect metrics is identifying risk areas. Modules with high defect counts, high defect density, repeated reopen defects, or many critical issues often require additional testing and development attention. These metrics help teams focus effort where the risk is highest.
Defect metrics also support release decisions. When testing is complete, stakeholders want to know how many defects remain open, how many are critical, how many have acceptable workarounds, and whether production risk is under control. Metrics make this discussion more transparent.
Defect metrics enable continuous process improvement. By analyzing defect trends across projects, organizations can identify weaknesses in requirements, design, coding, reviews, testing, configuration, deployment, or communication. The goal is not only to count defects, but to learn from them.
Defect metrics also improve communication between teams. Clear metrics provide a common understanding of product quality among testers, developers, managers, product owners, and business stakeholders. When everyone sees the same numbers and trend analysis, quality discussions become more aligned.
Defect Density
Defect Density measures the number of defects relative to the size of the software. It helps teams understand how defect-prone different parts of the system are.
Defect density is typically calculated by dividing the number of defects by the size of the software component. Size can be measured in different ways, such as number of modules, number of features, or lines of code.
A module with a higher defect density is usually considered less stable than a module with a lower defect density.
Defect density is particularly useful when comparing quality across modules. For example, if two modules have the same number of defects but one module is much larger, the smaller module may actually have poorer quality.
Defect density helps identify high-risk areas that require additional testing. It also helps teams focus improvement efforts on defect-prone components.
However, defect density should always be interpreted carefully. A high defect density may indicate poor quality, but it may also indicate thorough testing.
Defect density is especially useful when teams compare modules of different sizes. If a small payment validation component has twenty defects and a large reporting module also has twenty defects, the payment component may be more defect-prone because the same number of defects is concentrated in a smaller area. This helps teams avoid misleading conclusions from raw defect counts.
The challenge with defect density is choosing the right size measure. Lines of code can be useful in some engineering contexts, but manual testing teams may prefer features, screens, user stories, modules, or function points. The chosen size measure should be consistent so that comparisons remain meaningful.
Defect Severity Distribution
Defect severity distribution shows how defects are categorized based on severity levels such as Critical, High, Medium, and Low.
Severity distribution provides insight into the overall impact of defects on the system. A system with many low-severity defects may still be stable, while a system with several critical defects may be considered high risk.
Severity distribution helps teams assess business risk. Critical defects may block releases, while low-severity defects may be deferred.
Severity distribution also helps teams prioritize defect fixing activities. Developers often focus on higher-severity defects first.
Severity distribution is often presented in charts or graphs during test reporting. These visual representations help stakeholders quickly understand product stability.
A balanced severity distribution typically indicates a healthy testing process, while an unusually high number of critical defects may indicate serious quality issues.
Severity distribution is valuable because total defect count alone can be misleading. Fifty low-severity cosmetic defects may be less risky than five critical defects affecting login, payment, or data integrity. By separating defects by severity, teams can understand the seriousness of product risk rather than only the volume of issues.
Test leads often use severity distribution during release readiness meetings. If critical and high-severity defects are closed or accepted with clear business approval, the product may be ready for release even if some low-severity defects remain open. If critical defects remain unresolved, release may need to be delayed or scope may need to change.
Defect Priority Distribution
Defect priority distribution shows defects categorized based on urgency levels such as High, Medium, and Low priority.
While severity measures impact, priority measures urgency. Priority distribution helps teams plan defect fixing activities based on release timelines.
High-priority defects must usually be fixed immediately, while lower-priority defects may be deferred to future releases.
Priority distribution helps project managers allocate resources efficiently. If many high-priority defects exist, additional development effort may be required.
Priority distribution also helps teams manage release schedules. A large number of unresolved high-priority defects may delay a release.
Priority distribution reflects business decisions as well as technical considerations.
Priority distribution is useful because it shows how urgent the defect backlog is. A project may have many defects, but if most are low priority, the release risk may be manageable. On the other hand, a smaller defect count with many high-priority items may indicate serious schedule pressure.
Priority distribution also helps with resource planning. If high-priority defects are increasing, managers may need to assign more developers, reduce feature scope, extend testing time, or hold additional triage meetings. It helps connect quality data with project execution decisions.
Defect Leakage
Defect Leakage measures defects discovered after release compared to total defects discovered during the project.
Defect leakage is calculated by dividing the number of production defects by the total number of defects and multiplying by one hundred.
Defect leakage indicates how effective testing activities were at detecting defects before release.
A low defect leakage percentage usually indicates effective testing and good product quality.
High defect leakage indicates that defects are escaping into production, which may indicate insufficient test coverage or inadequate testing environments.
Defect leakage is one of the most important defect metrics because production defects directly affect customers.
Organizations often monitor defect leakage closely to improve testing effectiveness.
Defect leakage is one of the clearest indicators of how many defects escaped the pre-release quality process. If customers or production users find issues that should have been caught during testing, the team must investigate why those issues escaped. The cause may be missing test scenarios, weak regression coverage, incomplete environments, late requirement changes, or insufficient business validation.
However, defect leakage should be interpreted by impact as well as count. One production defect that corrupts financial data is more serious than several minor wording issues. Mature teams often analyze leakage by severity, affected module, root cause, and release phase instead of using only a single percentage.
Defect Rejection Rate
Defect Rejection Rate measures the percentage of reported defects that are rejected as invalid, duplicate, or not reproducible.
Rejection rate is calculated by dividing the number of rejected defects by total reported defects and multiplying by one hundred.
A high rejection rate may indicate unclear requirements or poor defect reporting practices.
Rejection rate may also indicate communication gaps between testers and developers.
A low rejection rate usually indicates clear requirements and accurate defect reporting.
Monitoring rejection rate helps teams improve defect reporting quality and requirement clarity.
Rejection rate should not be interpreted negatively without context. New testers or complex projects may naturally produce higher rejection rates.
A high rejection rate may mean testers need clearer requirements, better domain training, stronger defect reporting standards, or better communication with developers. It may also mean requirements are ambiguous and different team members understand the product differently. In that case, the metric reveals a collaboration problem, not just a testing problem.
A very low rejection rate is usually good, but it should still be viewed carefully. If testers avoid reporting uncertain issues because they fear rejection, valid defects may remain hidden. A healthy team encourages accurate reporting and uses rejected defects as learning opportunities rather than blame.
Defect Removal Efficiency (DRE)
Defect Removal Efficiency measures how effectively defects are removed before release.
DRE is calculated by dividing the number of defects removed before release by total defects discovered and multiplying by one hundred.
A high DRE percentage indicates that most defects were detected and fixed before release.
A low DRE percentage indicates that many defects escaped into production.
DRE is widely used as a quality indicator because it reflects both development and testing effectiveness.
Organizations often use DRE to evaluate process maturity and improvement.
DRE helps teams identify opportunities to improve requirement reviews, development practices, and testing coverage.
DRE is powerful because it connects pre-release testing with post-release quality. If most defects are found and removed before release, the team has a strong defect detection process. If many defects are discovered after release, the team must improve earlier quality activities. This may include requirement reviews, code reviews, unit testing, integration testing, system testing, regression testing, or user acceptance testing.
DRE should be tracked across releases rather than judged from one project alone. A single release may be unusual because of scope, complexity, or time pressure. Long-term DRE trends provide better insight into process maturity.
Defect Aging
Defect Aging measures how long defects remain open before being resolved.
Defect aging helps teams identify process bottlenecks. If defects remain open for long periods, development or testing processes may need improvement.
Long defect aging times may indicate resource shortages or complex issues.
Short defect aging times usually indicate efficient defect resolution processes.
Defect aging helps teams improve turnaround time and release predictability.
Defect aging is often monitored through defect tracking tools.
Defect aging is particularly useful for identifying stuck defects. A defect may remain open because the root cause is unclear, the owner is not assigned, the fix is complex, the business decision is pending, or the development team has competing priorities. Aging metrics help managers see where action is needed.
Aging should also be analyzed by priority and severity. A low-priority defect open for a long time may be acceptable, but a high-priority defect open for many days may indicate release risk. This is why defect aging dashboards often separate critical, high, medium, and low defects.
Practical Formulas and Interpretation
Defect metrics become more useful when teams understand both the formula and the meaning behind the formula. A metric should never be treated as a mathematical number only. It should answer a quality question. Defect density asks which parts of the application are more defect-prone. Defect leakage asks how many issues escaped into production. Defect aging asks how long defects are remaining unresolved. Defect removal efficiency asks how effective the team was at detecting and removing defects before release.
A common defect density formula is total defects divided by software size. If a module has thirty defects and the chosen size measure is ten features, the defect density is three defects per feature. This number does not automatically prove the module is bad, but it tells the team that the module deserves closer analysis, especially if other modules have much lower density.
A common defect leakage formula is production defects divided by total defects, multiplied by one hundred. If a project found two hundred defects before release and ten defects after release, leakage is approximately 4.76 percent when calculated as ten divided by two hundred and ten. Some organizations use slightly different formulas, so the team should define the calculation clearly before comparing results.
Defect rejection rate is calculated by dividing rejected defects by total reported defects and multiplying by one hundred. If one hundred defects are reported and fifteen are rejected, the rejection rate is fifteen percent. The next question is why. Are testers misunderstanding requirements? Are developers rejecting valid defects too quickly? Are duplicate reports common? The metric points to the discussion, but the discussion produces the improvement.
Defect Removal Efficiency is usually calculated as defects removed before release divided by total defects found before and after release, multiplied by one hundred. If ninety defects were removed before release and ten were found after release, DRE is ninety percent. A high DRE is a positive sign, but the team should still review the severity of escaped defects. Even one escaped critical defect can matter more than many minor defects found before release.
The practical rule is simple: every defect metric should lead to a decision or a learning point. If a metric does not help the team prioritize, improve, communicate, or reduce risk, it may not be worth tracking. Useful metrics are connected to action.
Sample Defect Metrics Snapshot
A typical defect metrics snapshot provides a summary of key defect measurements for a testing cycle.
For example, a test cycle might include one hundred and twenty total defects, with five critical defects and twelve open defects. Defect leakage might be three percent, while rejection rate might be eight percent.
Such snapshots provide a quick overview of product quality and testing progress.
Managers often use defect metric snapshots during status meetings and release reviews.
Snapshots are useful for communication but should be supported by deeper analysis.
A useful snapshot may include total defects reported, defects by status, open critical defects, defects by module, rejected defects, reopened defects, average defect age, defect leakage, and defect removal efficiency. The exact metrics depend on project needs. A small project may need only a simple summary, while a large enterprise release may require detailed dashboards.
A snapshot should tell a story. For example, if total defects are decreasing but open high-priority defects remain unchanged, the product may still not be release-ready. If defect count is high but most defects are already closed and no critical issues remain, the trend may be positive. Numbers should be presented with interpretation.
Manual Tester’s Role in Defect Metrics
Manual testers play an essential role in producing accurate defect metrics.
Testers must log defects accurately and consistently. Incorrect defect data can lead to misleading metrics.
Testers must assign correct severity levels. Incorrect severity assignment can distort severity distribution metrics.
Testers must update defect status regularly. Outdated defect status leads to inaccurate metrics.
Testers provide important context for interpreting metrics. Numbers alone cannot explain defect trends.
Testers also help identify patterns in defect data that may indicate process improvements.
Accurate tester contributions ensure reliable defect metrics.
Manual testers influence metric quality every time they log or update a defect. If a tester chooses the wrong module, metrics may show risk in the wrong area. If severity is exaggerated, severity distribution becomes misleading. If defect status is not updated after retesting, open defect counts become inaccurate. Clean data depends on disciplined defect management.
Testers also provide context that dashboards cannot capture. A report may show that many defects were found in one module, but testers may explain that the module had the most testing effort or the most recent changes. This context prevents stakeholders from misreading the numbers.
Using Defect Metrics Effectively
Defect metrics should be used to analyze trends rather than individual numbers. A single metric value rarely provides meaningful insights.
Defect metrics should be combined with qualitative insights. Tester observations and project knowledge help explain metric trends.
Metrics should never be used to blame individuals. Defect metrics measure processes, not personal performance.
Effective use of metrics requires understanding project context. Different projects have different complexity levels and risk factors.
Defect metrics should be reviewed regularly to identify improvement opportunities.
Organizations that use metrics constructively achieve better quality outcomes.
Effective metric usage starts with clear definitions. Teams must agree on what counts as a defect, how severity is assigned, how priority is assigned, what rejected means, when a defect is considered closed, and how production defects are counted. Without consistent definitions, metrics from different teams or releases cannot be compared reliably.
Metrics should also be reviewed at the right frequency. Daily metrics may be useful during active test execution, while weekly trend reports may be enough during slower phases. Release readiness meetings may need focused metrics on open high-priority defects, leakage risk, and unresolved blockers. The metric set should match the decision being made.
Common Misinterpretations
One common misunderstanding is assuming that more defects indicate poor testers. In reality, more defects may indicate thorough testing.
Another misconception is that fewer defects always indicate better quality. Low defect counts may indicate insufficient testing.
Metrics without context can be misleading. A project with high defect counts may still be successful if defects are detected early.
Another mistake is focusing only on numbers instead of trends. Long-term trends provide better insights than single measurements.
Understanding these limitations is essential for effective metric interpretation.
Another common mistake is using metrics to compare individuals. For example, counting how many defects each tester finds can create unhealthy behavior. Testers may focus on quantity instead of quality, report low-value issues, or compete instead of collaborating. Defect metrics should improve product and process quality, not create fear.
Teams should also avoid treating metrics as absolute truth. Metrics are only as reliable as the data behind them. If defects are not logged consistently, if statuses are outdated, or if severity is assigned differently by different people, the resulting analysis will be weak. Good metric interpretation requires both clean data and practical judgment.
Defect Metrics vs Test Metrics
Defect metrics focus on product quality by analyzing defect information. Test metrics focus on testing progress and execution status.
Defect metrics measure quality issues, while test metrics measure testing activities.
Both types of metrics are important for project monitoring.
Together, defect metrics and test metrics provide a complete view of testing progress and product quality.
For example, test metrics may show that ninety percent of test cases have passed, while defect metrics may show that several critical defects remain open. In that situation, high execution progress does not automatically mean the product is ready. Conversely, defect metrics may show few open defects, but test metrics may reveal that important test cases have not yet been executed. Both views are needed.
Defect Metrics in Real Projects
In real-world projects, defect metrics are often presented in dashboards and reports.
Test managers use defect metrics to track quality trends across releases.
Development teams use defect metrics to identify improvement areas.
Stakeholders use defect metrics to support release decisions.
Historical defect metrics help organizations improve future projects.
Defect metrics are especially important in large and complex projects where quality risks are significant.
In real projects, defect metrics are often discussed during daily QA status meetings, sprint reviews, release readiness meetings, defect triage sessions, and post-release retrospectives. They help teams understand whether quality is improving, whether the backlog is under control, and whether certain modules need special attention.
Historical defect metrics are also valuable. If one module repeatedly shows high defect density across releases, the team may need refactoring, stronger unit tests, better ownership, or deeper design review. If production leakage remains high across multiple releases, the organization may need stronger regression testing, better environments, or earlier business validation.
Interview Perspective
Defect metrics are an important topic in manual testing interviews.
A short answer typically defines defect metrics as measurements used to evaluate software quality.
A detailed answer explains how defect metrics help analyze defect trends, severity distribution, defect leakage, and removal efficiency.
Understanding defect metrics demonstrates practical testing knowledge.
Interviewers often expect testers to understand the purpose and interpretation of common defect metrics.
A strong interview answer should mention that defect metrics are not just counts. They help measure risk, quality trends, defect distribution, leakage, rejection rate, aging, and removal efficiency. The answer should also explain that metrics must be interpreted with context because numbers alone can mislead.
If asked for examples, a tester can mention defect density, severity distribution, priority distribution, defect leakage, defect rejection rate, defect removal efficiency, and defect aging. Explaining how each metric supports release decisions or process improvement makes the answer practical and interview-ready.
Key Takeaway
Defect Metrics provide a structured and objective way to measure software quality and testing effectiveness. They help teams understand risk areas, improve testing processes, and make informed release decisions.
However, defect metrics must always be interpreted with proper context and professional judgment. Data alone does not define quality — meaningful analysis and experience are essential for making the right decisions.
The best use of defect metrics is constructive. Metrics should help teams learn, improve, prioritize, and communicate. When used responsibly, they turn defect data into practical quality intelligence and help organizations deliver more stable software over time.